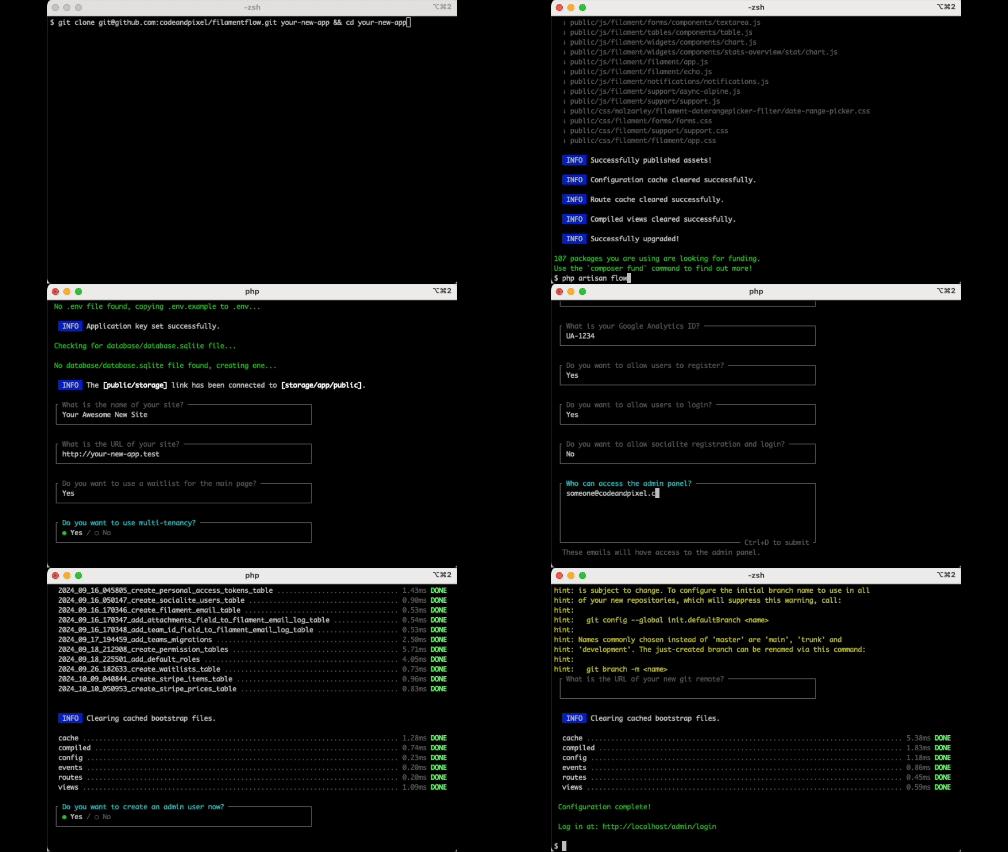
Installation
Getting started with FilamentFlow is so easy my grandma could do it (probably).

Fork and Clone the Repository
You can fork and clone the repository and install the dependencies with Composer:
- Fork the Repository: FilamentFlow
- Clone the forked Repository
- Install Composer Dependencies
- Configure FilamentFlow
git clone [email protected]:[your username]/[your forked repo].git your-new-app && cd your-new-app
composer install
Really hate to mention this, but be sure to replace [your username] and [your forked repo] with your actual GitHub username and the name of the repository you forked.
Automatic Configuration
This command will publish the configuration files, run the migrations, initialize the front end, seed the database with the default data, create your admin users, and give you a fresh start with your application in less than 5 minutes.
FilamentFlow comes with a command that will automatically configure your application for you. You can run the following command to configure your application:
php artisan flow:configure
Manual Configuration
If you prefer to configure your application manually, you can follow the steps below:
Publish Configuration
cp .env.example .env
php artisan key:generate
php artisan storage:link
Database Configuration
Update your .env file with your database credentials:
DB_CONNECTION=mysql
DB_HOST=
DB_PORT=
DB_DATABASE=
DB_USERNAME=
DB_PASSWORD=